Free Shipping

Spring is finally getting underway and the sunnier days are a reminder that the long, warmer (hopefully) and still sunnier days of summer will soon be here. If you love to sew then maybe that’s as good a reason as any to arm yourself with pretty fabric, get out your sewing machine and fill your wardrobe with pretty dresses, skirts… shorts for yourself or for your loved ones.

Discount code

To tempt you along this next week at least take advantage of our free shipping.  Enter the code sewfree on checking out for the shipping costs (applicable to the UK only) to be deducted from your final basket.

Happy Sewing!

Interlining…

They do a great job
They do a great job

If you’re serious about your sewing then you’re probably serious about your interlining.  It is after all what makes a sewing project look and feel well made.  It doesn’t have to be a store bought interlining other fabrics can do the job just as well… something like a calico perhaps.

However, if you’re sewing from a proprietary sewing pattern it’s likely that it specifies a Vilene if you’re in Europe or parts of Australia or Pellon if you’re not.  Those by the way are both manufacturers trade name and not products as such.  Those names stand behind huge ranges of interlinings, waddings and embroidery stabilisers.  So, what do you do if you’ve bought a pattern specifying a Pellon brand and you can’t get it unless you wait three weeks, spend a small fortune and keep your fingers crossed that the Customs man doesn’t take a shine to it.  Well, you can try a Vilene interlining in its stead.  This is where this little PDF comes in.

Its a free download on the shop that shares what I’ve found out about interlinings and their equivalents over the last few years and I hope you find it useful.

Solufleece Vilene S320 Embroidery Stabiliser and something about crashing

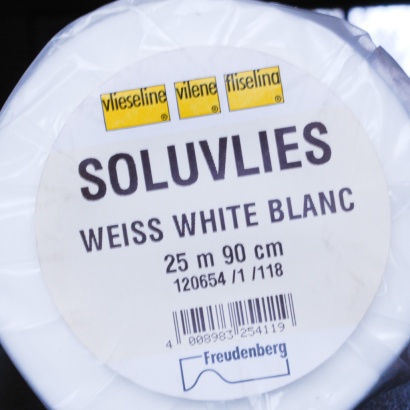
Solufleece Vilene S320 water soluble Embroidery Stabiliser

Solufleece - water soluble embroidery stabiliser... brilliant stuff
Solufleece – water soluble embroidery stabiliser… brilliant stuffThis Sol;

This is a brilliant product with so many potential uses. Primarily it’s intended as a stabiliser for both hand and machine embroidery.  It copes fantastically well with dense embroidery and once the sewing is completed it dissolves away in either cold or warm water and dries without leaving a sticky residue.

If you are feeling really particularly creative you can layer fabric snippets and threads onto a sheet of solufleece and cover it with another sheet.    Place it in an embroidery hoop and free machine all over it.  The thread you use can form another design element.  Once you’ve finished, dissolve the solufleece in water and you’ll be left with a piece of exciting new fabric to use in  other sewing projects.

Solufleece can also be used to create stitched motifs.  To do this draw your motif onto the solufleece either freehand or print a picture off and trace it onto the solufleece and machine embroider the design.  You may also print onto the fleece with print blocks.  When embroidering your design note that all threads need to connect to each other so that once you dissolve away the fleece the motif remains intact.  Carefully open out your design and lay it down flat to dry. Once it’s dried it can now be used to decorate your sewing.  Decorate up a plain t-shirt for example.

‘Crashing’ is another technique that solufleece can be used for and although it sounds a little drastic it’s a lot of fun.  To do this layer a piece of solufleece with 2 pieces of bondaweb the same size.

Place the solufleece at the bottom of the ‘sandwich’.  Remove the paper from the bondaweb making sure that you don’t tear the webbing and place both pieces on top of the solufleece.  Place the fabric right side facing up on the top.  This is quite a slippy sandwich of fabric plus stabilisers so if you’re not using a hoop you may wish to just pin carefully at the sides just until you get it do the sewing machine.

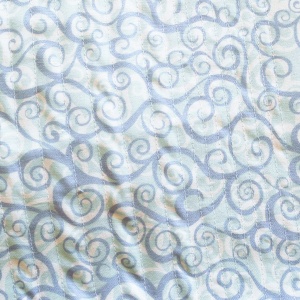
Get out the sewing machine and stitch either in parallel lines or randomly.  The different stitching patterns will give you different results. The further apart the lines the more ‘blousy’/ pouffy the effect.

Lines of stitching ...
Lines of stitching …

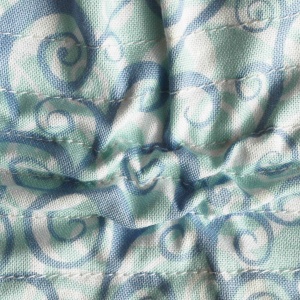
Once you’ve finished the stitching ‘hover’ a ‘steaming’ steam iron over the work.  Do not touch it with the iron.  See what happens, it is a truly magical thing.  The steam causes the solufleece to begin to dissolve and as it does so it draws up the fabric which is set into position by the bondaweb.

The start of the fabric drawing up to give pretty effects

Now you’ve a piece of fabric that you can paint, bead, dye stitch further … or use it as it is a fascinatingly textured piece.

Note, however that the fabric should be left alone for at least 30 minutes to an hour to cool and set properly before using it for anything else.

If you like the idea of giving this a try there’s a lot more information and pretty pictures over here 

Have fun and go where the creativity leads you.

A Fabric Sale

Hi there,

DSC_0707
Spring is on it’s way….

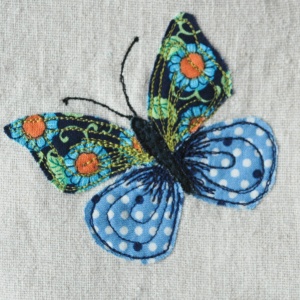
(I hope you don’t mind the gratuitous picture of a butterfly… but I’m desperate for the warmer, sunnier days of spring to arrive … it is stitched so it’s kind of relevant 🙂 )

But things to do so down to business… springtime is traditionally a time for Spring cleaning… sweeping out the old and welcoming in the new so I thought I’d have a bit of a spring sale to tidy things up a bit around here.

 30% Discount on Fabric Sale

Use Code:  CGLYHDQUTOAB

So, for the next week… that’s from today the 31st March until the 5th of April if you use this code: CGLYHDQUTOAB  (I’m sorry that’s a bit of a typing feat but I recommend that you definitely use any cut and paste option your computer, tablet, phone offers you.), you will receive a 30% discount on any fabrics you choose to buy.

I have tested it out to make sure everything works as I think it should but you never know… so if you have any difficulties at all then please just contact me through the shops email address.

There’s a lot of other stuff going around here so please stay in touch.

Jx

I’ve been working on a tutorial – How to Cover a self-cover Button

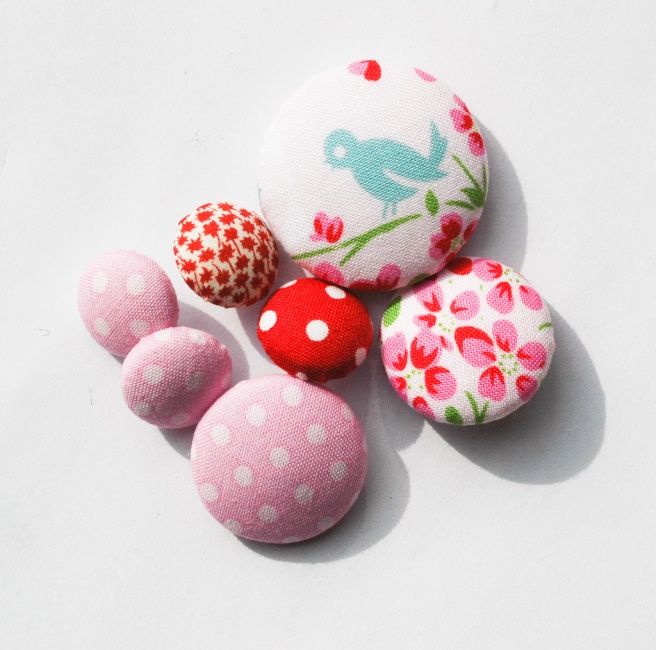
Despite the name self-cover buttons really don’t cover themselves.  But in their favour they’re not difficult to make and they are a great way of using up left over pieces of pretty fabric.  The small button with the leafy design was the tiniest piece of liberty fabric.   You can really make good use of all your precious scraps and have something beautiful at the end of your sewing.  But don’t just regard them just as a way of using up scraps as they can really add something to a sewing project giving it a coordinated and professional finish.

a little collection of self cover buttons

So, why not make some ?  You don’t need extensive sewing skills or bucket loads of sewing supplies.

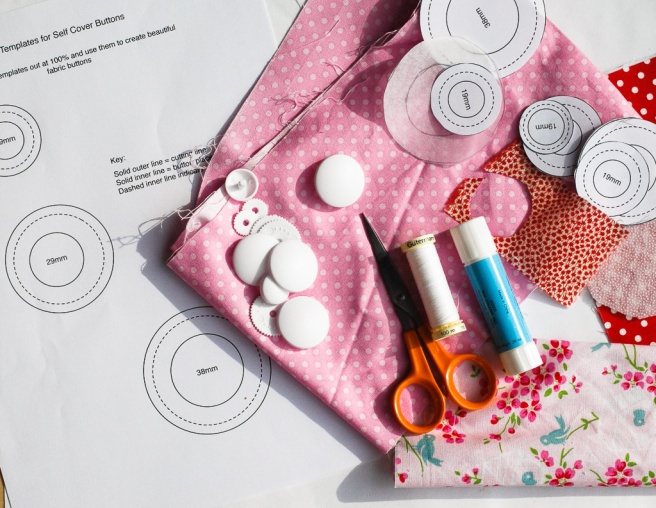
A few things you will need
    For the last few days I’ve been working on some step by step instructions for covering the plastic variety of cover-buttons in sizes 18mm. 29mm and 38mm with actual sized templates.  Having a pattern to hand can save a lot of time fiddling around creating your own… after all it’s better to be sewing than stressing or hunting templates you’re sure that you had once … somewhere.
    I like the plastic cover buttons as there are no issues with metal shining through the covering fabric… which can really spoil a look.  They are light and lend themselves so all kind of other button related craftiness which I will share with you here another day… soon.
Step by step instructions and templates for making your own pretty self-cover buttons

The instructions and patterns are now an instantly downloadable 10 page PDF with actual sized templates which you can print off and use time and time again so if you’d like to to get the tutorial and patterns just follow the link to the shop

        .

A Fabric brooch Tutorial

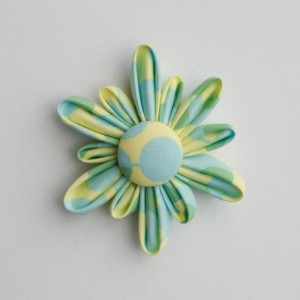
I wrote this blog post quite a while ago now but it’s always been popular and although I’ve changed where my blog is hosted etc. I didn’t want to lose this fabric brooch tutorial in the process.  So, I’m posting this here in the hope it can still be enjoyed.

Sorry that this has taken soooo long but here it is;
_dsc4170

This is really a little origami with fabric, and it works out equally well in paper…. cards… maybe?

Requirements;

I made my brooch using all the same fabric, but it can look equally pretty if you make the large petals in one fabric and the small petals in a contrasting fabric. You can make the flower with petals all the same size if you wish and can even throw caution to the wind and have each petal in a different colour…. just have fun with it.

These flowers can be used as an embellishment for all kind of things – think of a smaller flower used to adorn headbands or hair clips or fixed on to bags.
_dsc4151

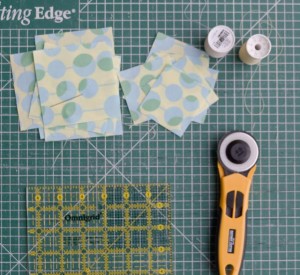
  • fabric – enough to cut six 3 1/2 inch squares (for the large petals)
    and six 2 1/2 inch squares (for the small petals)
  • matching thread
  • needle
  • scissors
  • button – for the centre. (Beads can look good too)
  • brooch back
  • a small piece of felt to create a backing for the flower
  • fabric glue (optional)

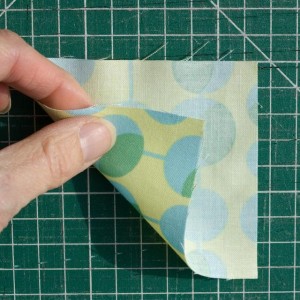
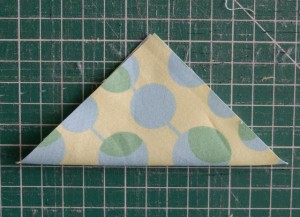
This first step is a little unusual, thread your needle. (You’ll be grateful…. really you will) I use a double thread and tie a neat knot in the end. Then place a square of fabric right side facing down and fold diagonally, corner to corner to make a triangle.
dsc_4178

_dsc4152

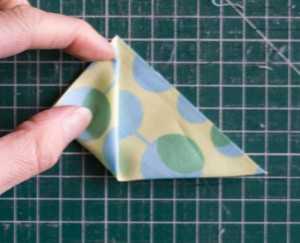
Next, take the bottom left corner of the triangle and fold it over to meet the point.
_dsc4154

O.K. This next step will test how nimble your fingers really are….

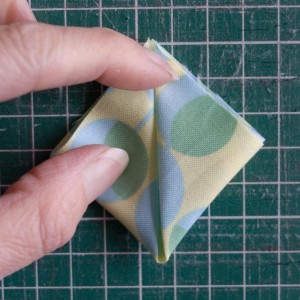
Fold the bottom right corner over to meet at the top, in exactly the same way as you did with the first corner.
_dsc4155

You are now looking at something which is square in shape with the folded seams down the middle.

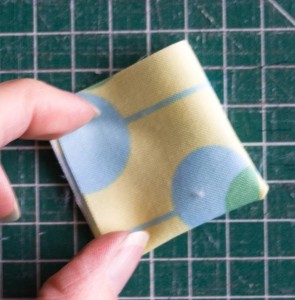
Holding on firmly to the square, turn it over, so that it’s face down on your mat, table or whatever.
_dsc4156

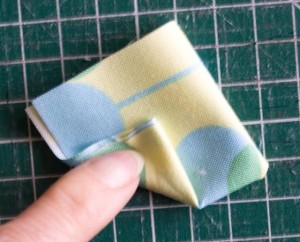
Can you still feel the folds with your finger? Bring the bottom corner over to the middle and hold in position.
.
_dsc4157

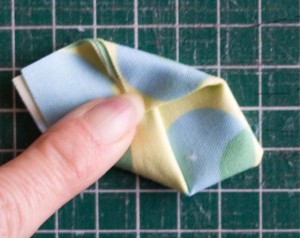
Then, fold the other corner into the middle. You should be looking at a kind of irregular shaped hexagon of fabric…..

which is probably making a bid for freedom, trying to escape and unfold itself, but onwards….
_dsc4158

Now, fold the two straight edges together as if you were closing a book.
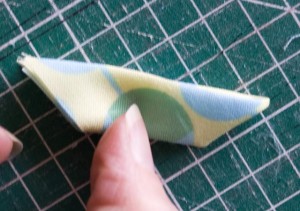
_dsc4159

If you look at the shape you should have oneside that looks like this; folds at the top and open edges at the bottom.
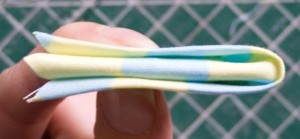
_dsc4162

Don’t let go….

Now for some sewing. I know that it’s more usual to just thread these petals together at this point but I’ve sometimes found that the folds at the back can spring open. So, just to make sure that they don’t, I put a little stitch at the bottom – like so. (Now you’re pleased we threaded the needle first aren’t you? Caused me some grief that step….)
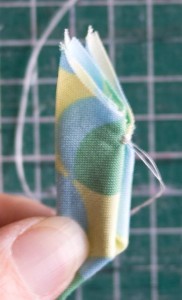
_dsc4164

Next cut off the triangle of fabric at the bottom of the fabric shape – if makes it easier to gather up the petals when you’ve finished because it elimnates this unnecessary bulk.
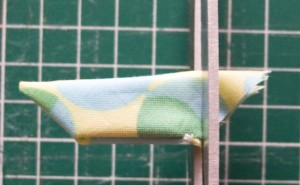
_dsc4165

….seriously large scissors !…

That’s it, your first petal…. now you just have to make the others…

When you’ve made all your petals, the next step is to string them together. Use a doubled thread – don’t forget the knot in the end and string one large petal, followed by one small petal etc until all the petals are strung together. Don’t pull too tightly.
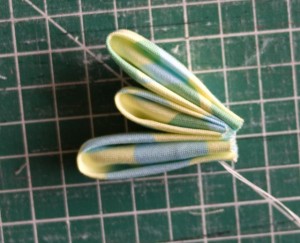
_dsc4167

.. beginning to look pretty isn’t it?

Once all the petals have been strung together, pass the needle back through the first petal to join the circle.
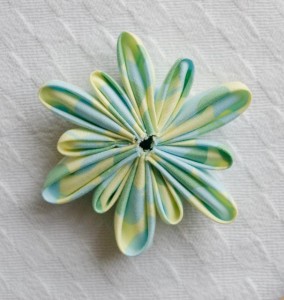
_dsc4169

almost there – just the finishing touches

I used a 29mm cover button, covered in the same fabric as my flower. (See this tutorial – Link). Again, you can use any kind of button or beads just to finish and decorate the middle of your flower.

Looking at your flower you may wish to just manipulate the flower petals into position before sewing on the felt. I think that this flower looks neater and more pleasing to the eye, if the top and bottom petals are opposite one another with the large side petals sticking out a bit like butterfly wings. The smaller petals will then sit nicely in-between.

It sometimes helps to use a little fabric glue to secure the button tightly to the flower (eliminates wiggles! – if you know what I mean) but I would always sew the button on too.
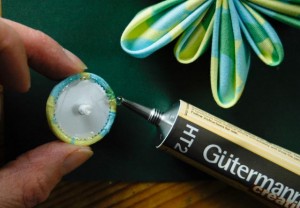
_dsc4254

Use a little glue – just around the edge…

The next step involves cutting a small round of felt to create a backing for the brooch. It doesn’t need to be large because there’s no unsightlness involved in making this, but it gives something to sew a button and a brooch back on to.

Sew on your felt, but don’t pull too tightly or you risk distorting the shape.
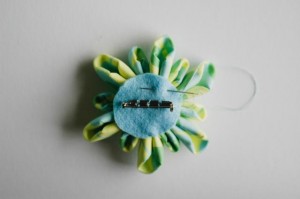
_dsc4258

Sew on the brooch back – turn it over and admire it.
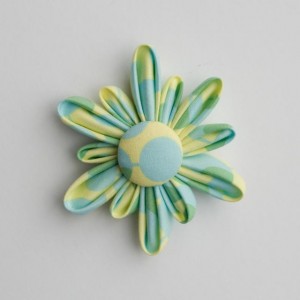
_dsc41701

Pleased with it ?

Whole Rolls of Interlining – H640 and wonderful woven G700-10

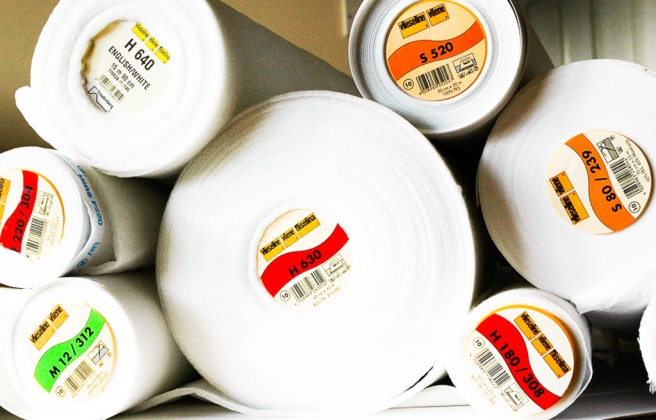
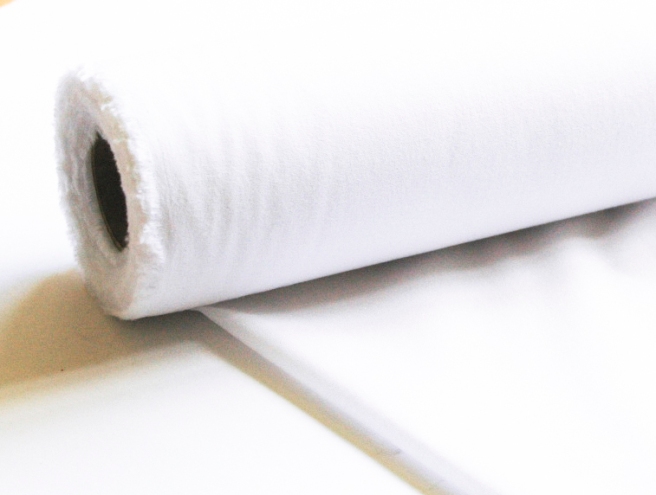
If you’re a seasoned crafter or are making to sell then sometimes is makes more sense financially and in terms of making the most of your craft investment to buy a whole roll of interlining.  So, today I’ve added whole rolls of H640 fusible fleece and the wonderful white G700-10 woven interlining.

I

I know I’ve said it before but I hardly make anything these days without the inclusion of the G700-10.  It’s wonderful.  I quite often use it behind my embroidery as a stabiliser and it works really well.

But I digress… back to the whole rolls thing which is really the news I was trying to share.

Buying a whole roll might be a better option if you’re a using large amounts of the stuff … it’s easier to handle for example as it comes on a roll and you can make the most careful use of it.  Therefore I’ve added the option to buy a whole roll of this and of the H640 medium loft fleece to the shop. I’m sorry that this is only available to UK customers.

To purchase these items you just add them to your basket and check out.  The shipping costs are included in the cost of the interlining so the price you see if the price you will pay.  The interlining will be shipped by Royal Mail Parcel force as that’s just about all I have available to me here if I don’t want to start traversing the country, for one thing I don’t have the hours in the day.

From ordering to dispatch I’m estimating will take upto 3 days … but it may well be quicker than that.

I’d love to know what  you think?

Why I use Vilene G700 woven craft interlining and why you should too….

I really love Vilene’s G700 interlining.  I use it in almost everything I sew these days.  Sometimes I combine it with fusible fleece to provide an extra plushnes but not always.

DSC_9811

DSC_9896

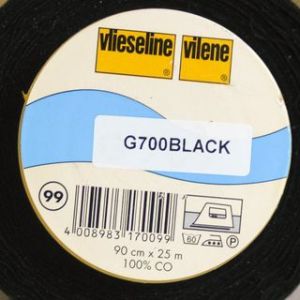
It comes in both white and black

colourways and is 90cm wide.  It is described as giving a medium amount of support (by Vilene.).  And it’s a medium amount of support which still leaves your fabric nice and soft and drapey.  It feels nice and soft… on one side anyway the adhesive side is a bit more granular feeling.

It may be useful to know that this is Vilene’s equivalent to Pellon Shape-flex fusible woven SF-101.

It’s a woven interlining which means that it has a straight of grain in the same way that fabric has.  This means two things; one that if you match the straight of grain of the interlining with that of the fabric that you apply it to, it results in a soft, but supported drape.  Secondly, if you place the straight of grain of the interlining across the straight of grain of the fabric you can limit the amount of movement in the fabric…. should you wish to.  I can’t think of a reason why you’d want to do that other than on fabrics where rough handling can stretch it out of shape.  If you know any other reasons that you’d want to do this then please share.

As this interlining is fusible on one side you can iron it onto your fabric and it will stay put.  Just follow the instructions and you shouldn’t get into any trouble.  One thing you should be wary off though is ensuring that there are no ‘lint’ or thread bits trapped between the interlining and the fabric or the outcome will be potentially ‘sad’.  It will be there forever a little lumpy bit of imperfection that you either have to learn to live or try and do something about it. It is possible to try to carefully peel the interlining off of the fabric (and if it’s really had time to ‘set’ it may not cooperate) and retrieve it … sometimes it will fuse back down successfully and sometimes it won’t.

A really neat trick I picked up somewhere a while ago is to iron the fabric onto the fusible interlining before cutting out the pattern pieces.  This way you get really neat edges so that the interlining isn’t in danger of disguising your sewing edge leading to inaccurate matching and sewing of seams (shock, horror).  On some projects however, such as sewing small pouches or bags I  don’t want even this lovely interlining left in the seams as it can prevent them laying as ‘flat’ as I’d like them to.  So then I  take a different approach and cut the interlining separately and without the required seam allowance when cutting out the fabric.  For example; if the seam allowance for the fabric pieces are 1/4 inch then I’d cut the interlining with an approximate 1/8th of an inch seam allowance.  That way it is still sewn into the seams but isn’t trying to push the fabric in ways I just don’t want.

The vital statistics of G700 are as follows;

  • It is suitable for light to medium weight fabrics
  • Washable in temperatures up to 60 °C
  • It retains its shape

How to apply the interlining

  • It’s simple to fuse the interlining to fabric with a steam iron (or lightly mist with water if you don’t have a steam iron.)
  • Iron setting: Cotton
  • Place the interfacing with the coated side against the wrong side of the fabric.
  • Glide the steam iron slowly over each area 6 or so times or cover with a damp cloth and press each area for about 12 seconds, without moving the iron (Protect the iron from contact with the ‘adhesive’ – use a pressing cloth or baking parchment.)
  • Allow the pieces to cool flat for about 30 minutes, so that the adhesive can set properly.

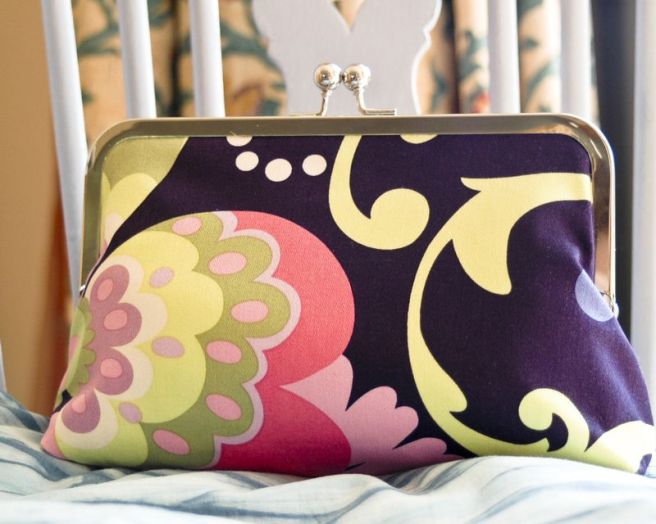
I used this interlining in this metal frame purse… just saying…  I really do use it 🙂

DSC_9915